Enroll as Super Admin
A few minutes after the ending of the subscription process you will receive two e-mails in the technical mailbox specific during step 3.
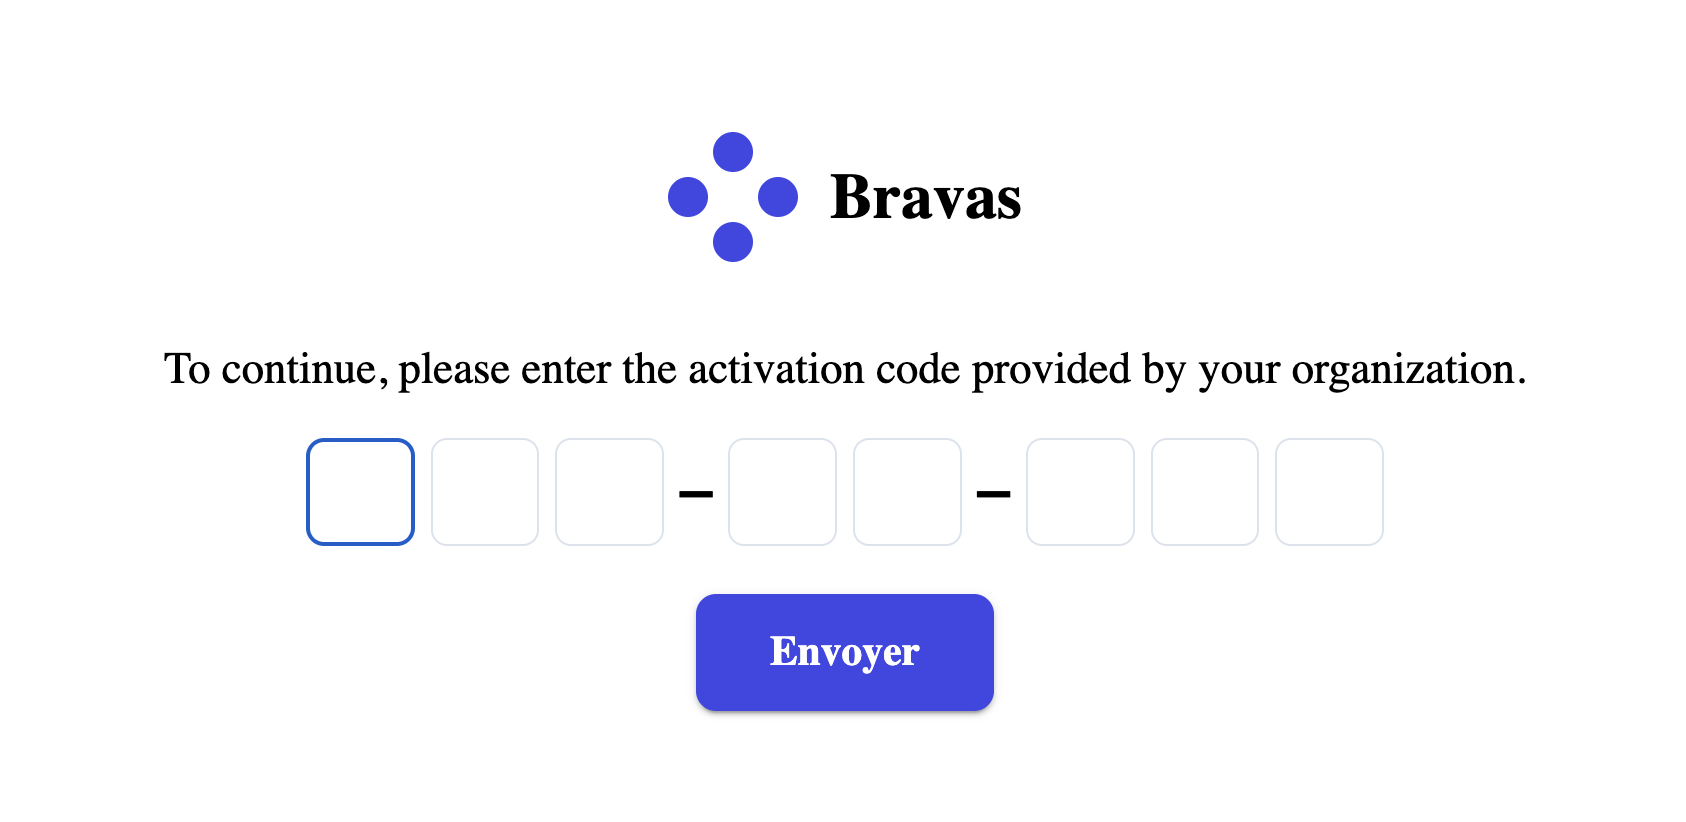
The first e-mail will be a welcome e-mail with all the information needed to get help, and the second will give an enrollment URL as well as an activation code to get your Super Admin token.
What this enrollment will do
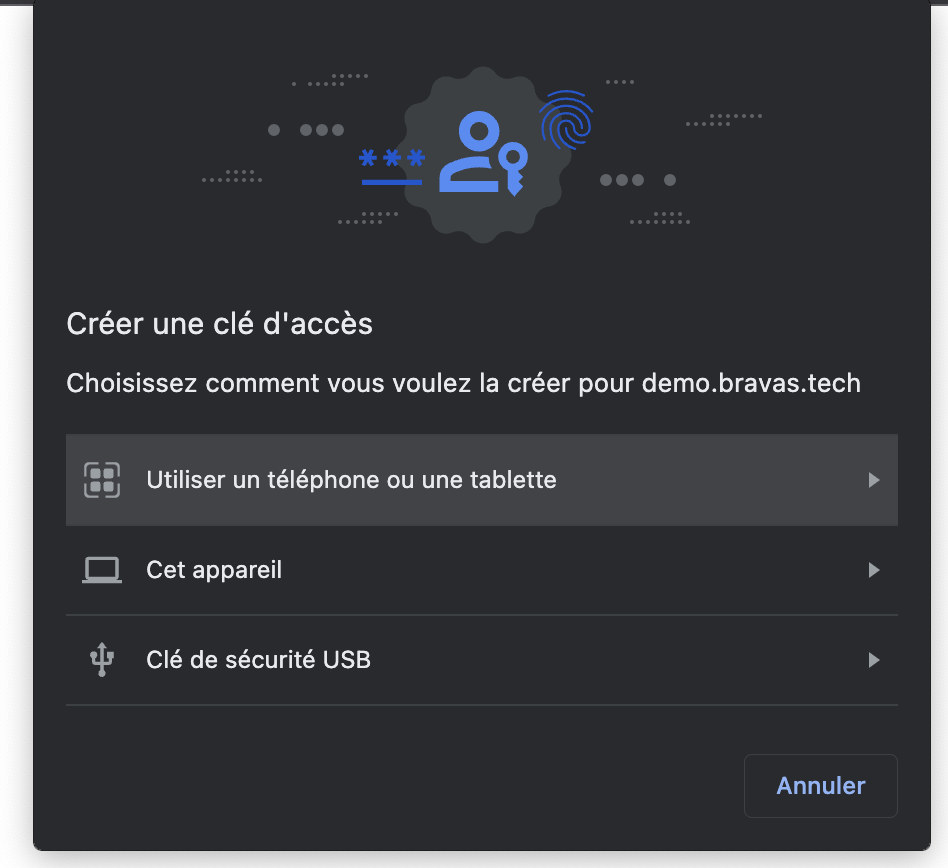
Following the enrollment URL using the activation code will allow you to follow a modern enrollment process based on WebAuthN (Web AutheNtication) installing some security keys either on:
- your browser profile, which cannot be used on other devices or other browsers on the same device
- your device, which cannot be used on other devices and should work with most browsers on the same device
- a software passkey vault such as an iCloud account, a Google account, a Microsoft account, or any third part vault system such as 1Password
- a FIDO2 token like a Yubikey
If you want a state-of-the-art deployment, ready for all kinds of security audit, your Super Admin token should be enrolled to a FIDO2 token kept in the company safe box like any other highly sensitive asset.
Otherwise, we recommend that you opt for the passkey option to allow access to that token even if you lose access to your company device.
Regardless of the process used, the choice needs to be written in your internal IT documentation and will not really be used on a daily basis. Your daily admin process will use your upcoming named account on your managed devices.
Be sure to understand this section and have a decision made before going further.
If you want to familiarize yourself with this enrollment process before doing it with Bravas, we advise you to take a look at the Yubico test site.
Enrolling your access token
Now that you understand what we will do, be sure to have your access token ready and click on the enrollment button in the second e-mail you got. This will lead you to a webpage asking for an activation code. This code is in the same e-mail, just copy and paste it.
Once the activation code is validated, your browser will present you with the WebAuthN enrollment process we described in the previous session. The user experience will change depending on your browser.
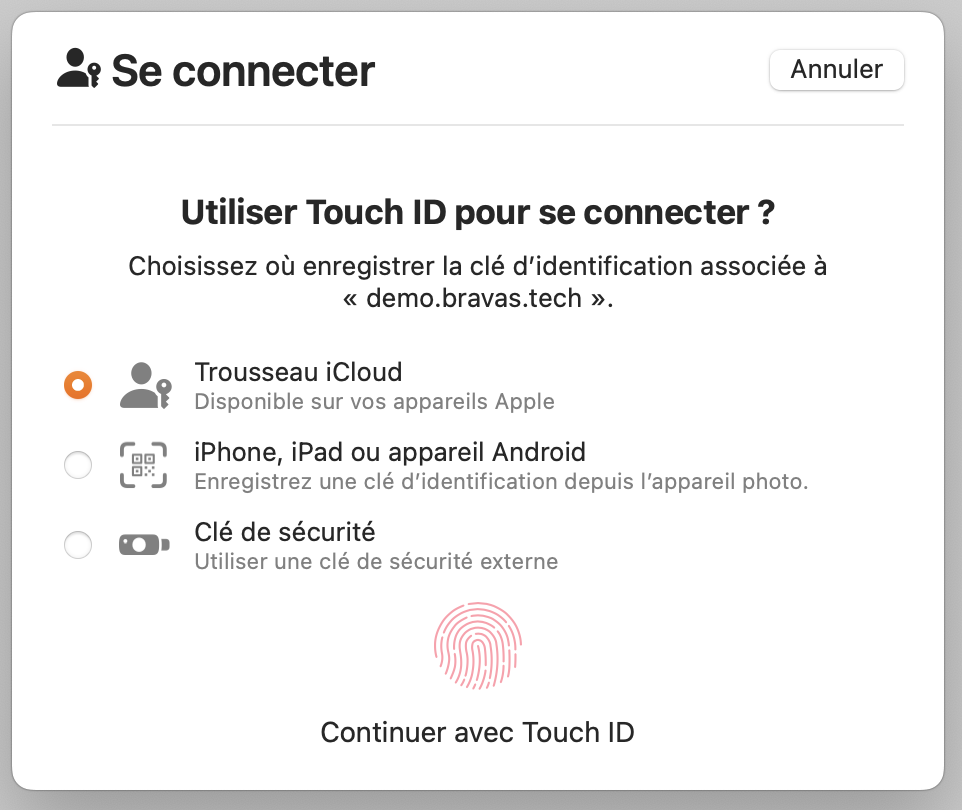
After the enrollment process, you will be immediately redirected to your Bravas's admin console, and so will be asked to authenticate with your freshly created token. Expect to have to interact with your security token twice then, initially for enrollment, then for authentication.
Naming Your Access Token
Once authenticated for the first time, we recommend that you give a name to that token in the Configure tab, then in Platform Security on the left-hand menu. This will lead you to a page allowing you to manage the Super Admin role for named users (we will get to that later) as well as a Super Admin secure token like the one we just created.
You will find those Super Admin secure tokens at the end of the page. Feel free to select one and click on the Edit button to rename it to something meaningful like Yubikey in Headquarter's safebox or Alice's iPhone.
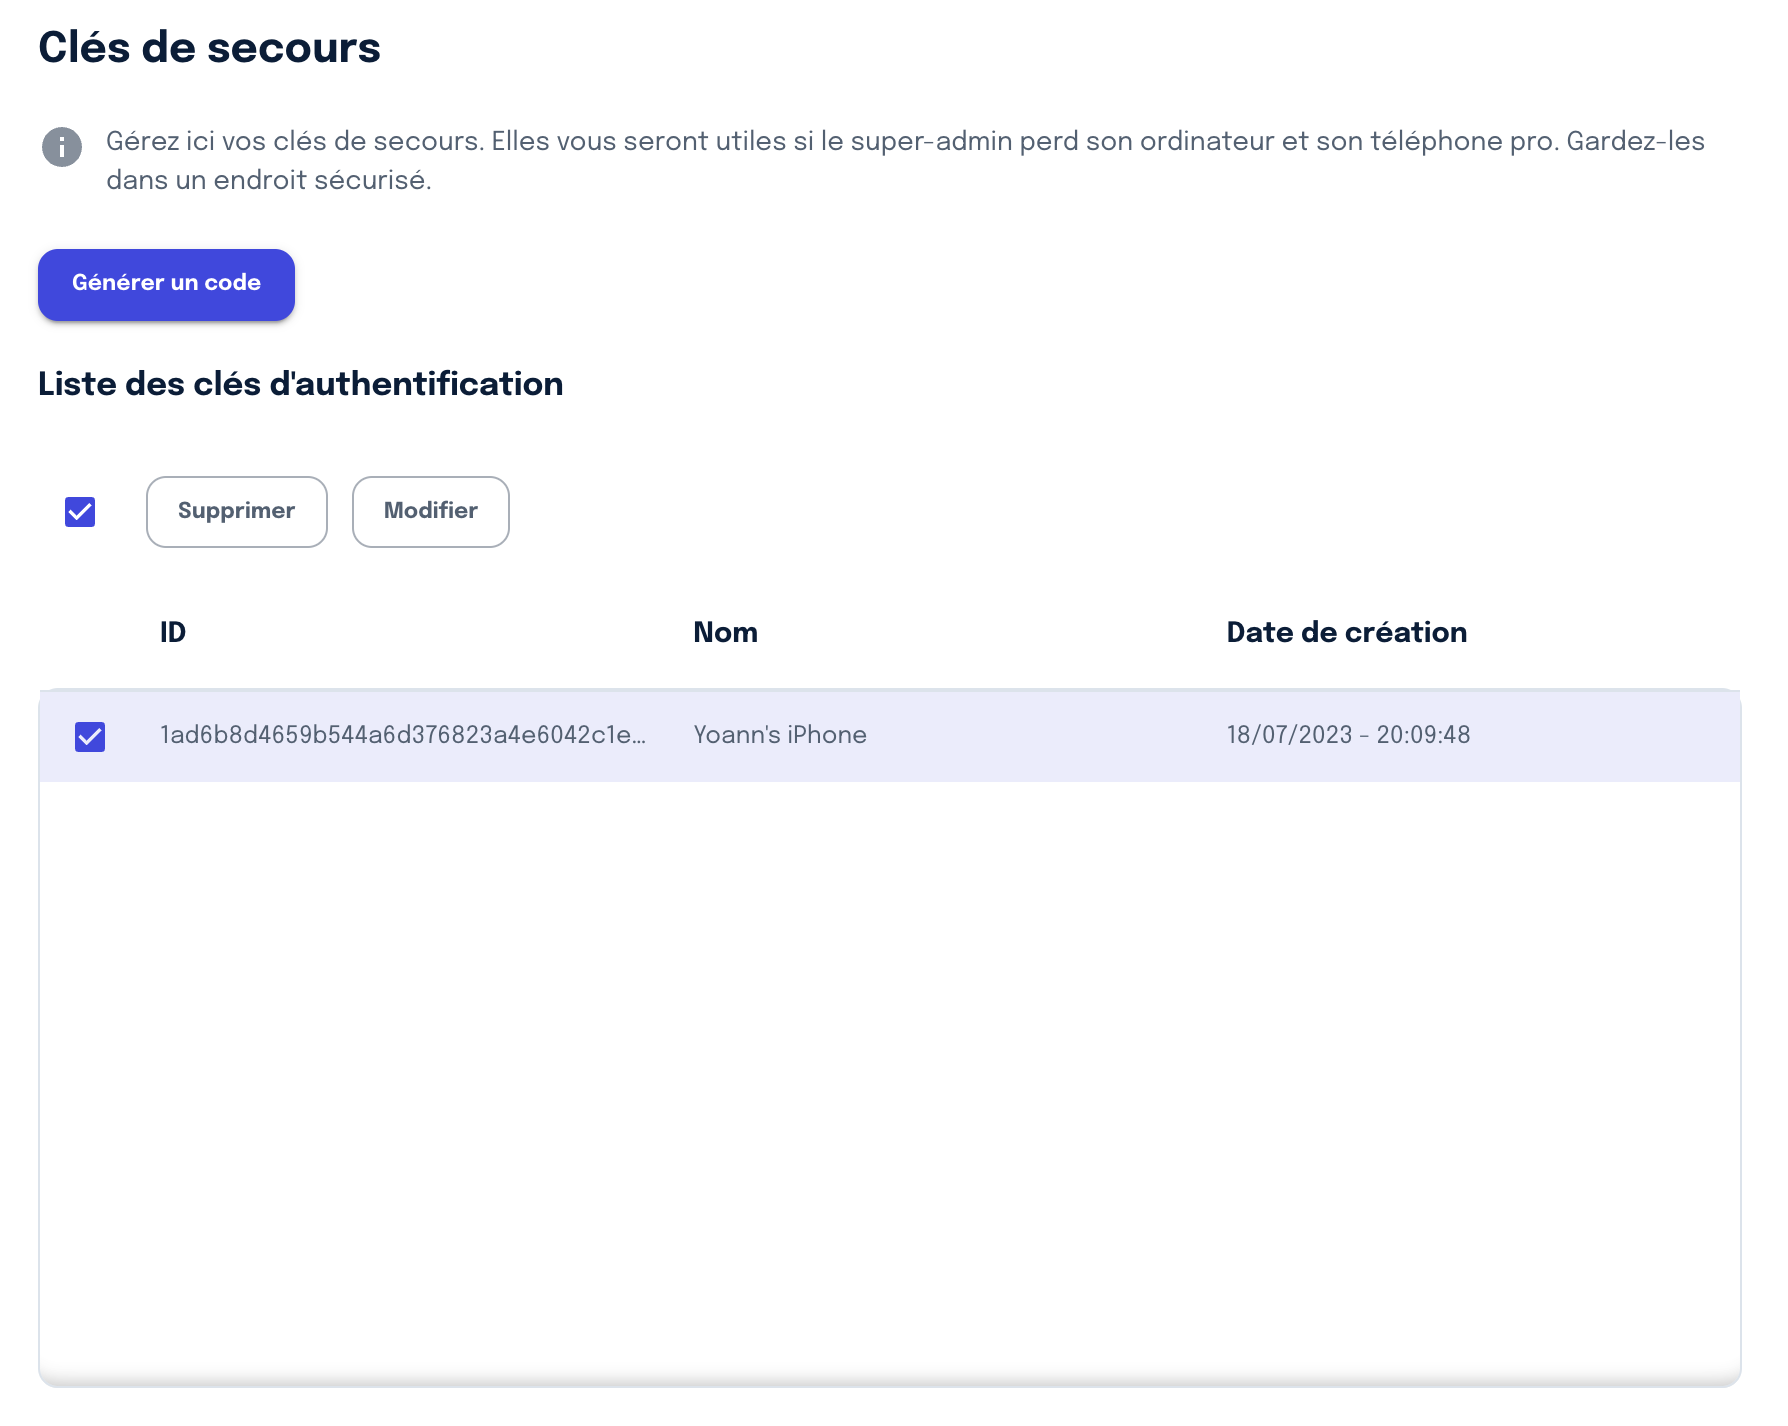
As you understand now, those Super Admin tokens will be used in disaster recovery situations if you need to access Bravas but all your managed devices are inaccessible. So it is a good idea to have two tokens like that. Above the table showing all existing tokens, you will find a button to generate an activation code for a new one. Use it and follow that same process again to enroll and name a second token.